


Tutorial · Architect 3D 26 for Windows
How to create a roof plan with Architect 3D
Updated · About 6 minutes
Written for Architect 3D 26 for Windows. The Mac edition has similar tools, though some menu names differ.
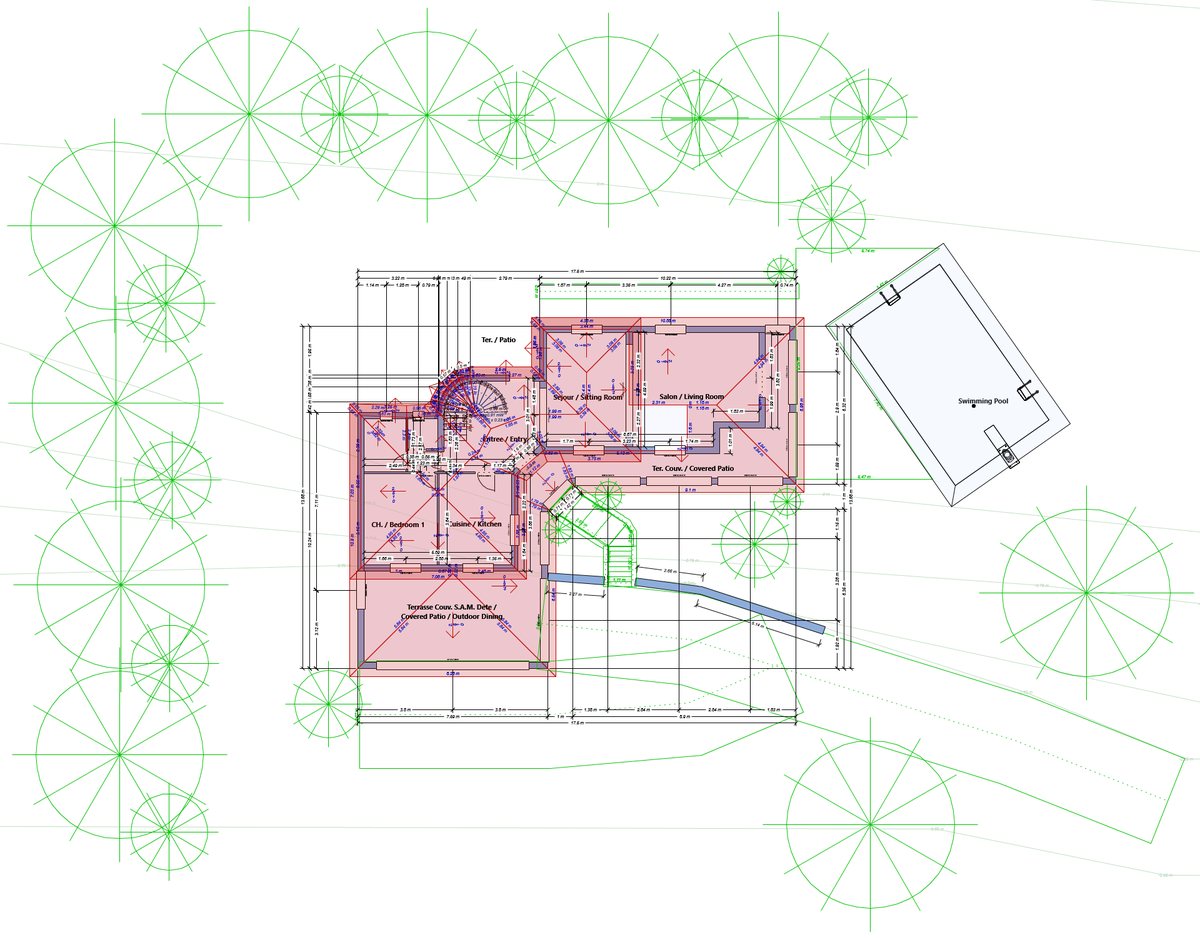
A roof plan is a scaled drawing of a building seen from above, showing each roof plane and what sits on it: vents, chimneys, skylights, dormers. It is one of the drawings usually asked for with a planning or building permit application; exactly what it must show depends on where you build.
Draw the walls of every floor first. The roof is built on them.
Step 1: Choose how to build the roof
All the roof tools are on the Roof tab. Pick the method that fits your floor plan.
Option 1: a predefined roof shape (regular floor plans)
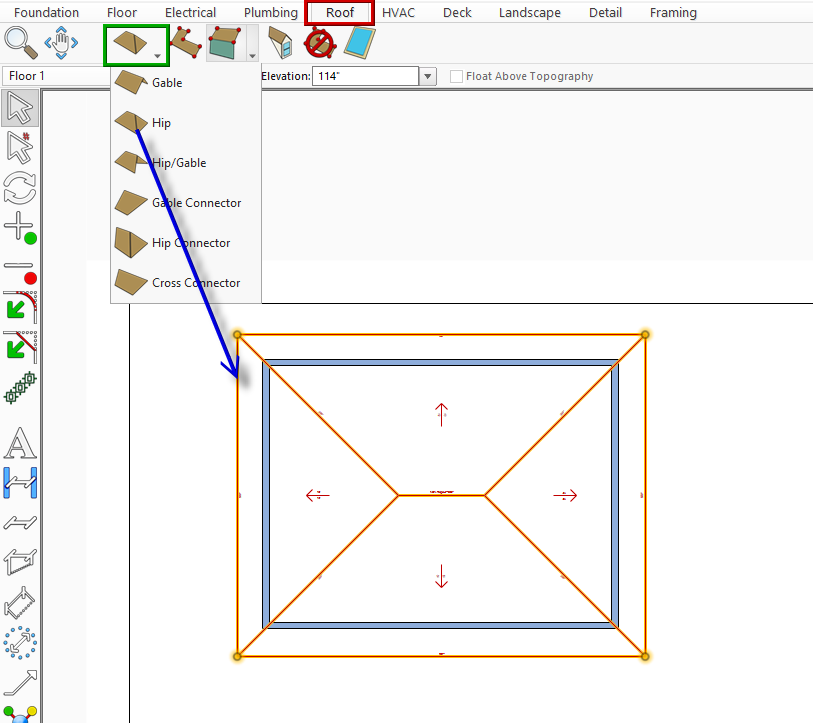
Click the first roof tool on the Roof tab and choose one of the predefined shapes, such as gable or hip, from its drop-down menu. Then drag the roof over the plan.
Option 2: the freehand roof tools (irregular plans)
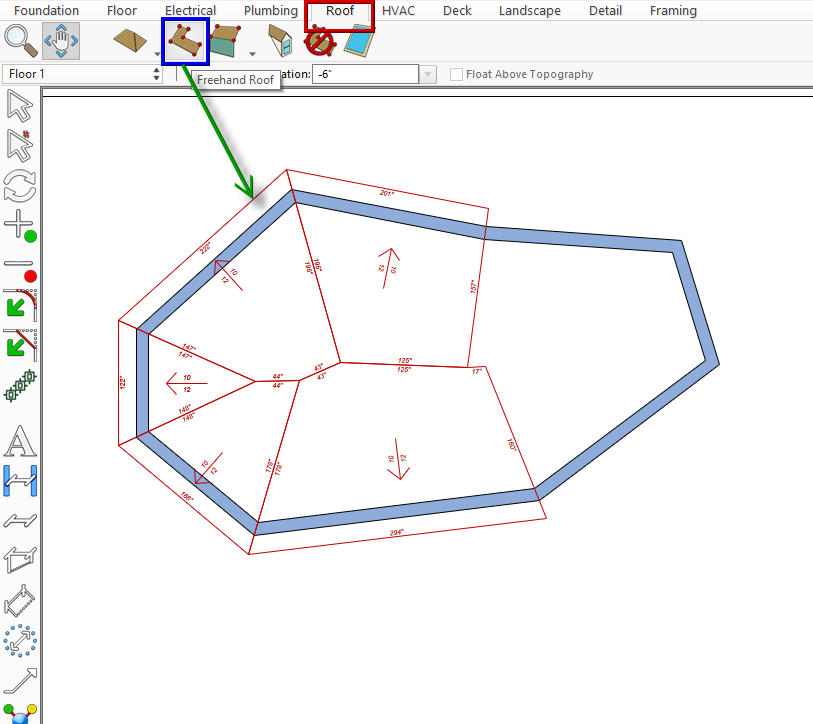
For an irregular footprint or unusual roof sections, use the Freehand Roof tool and outline the roof shape on the plan. The Four-Point and Three-Point Freehand Roof tools in the same toolset draw a rectangular or triangular section attached to a wall. Every section you draw this way can be edited on its own: pitch, elevation, overhang and shape.
Option 3: the automatic roof (any plan)
- Move the pointer over the outer walls until the perimeter is highlighted, then click it. It turns yellow and its properties appear on the Properties tab.
- Click Options to open the automatic roof options. Set the roof pitch (as a ratio or an angle), the soffit depth and the framing settings, then click OK.
- Click Build Roof.
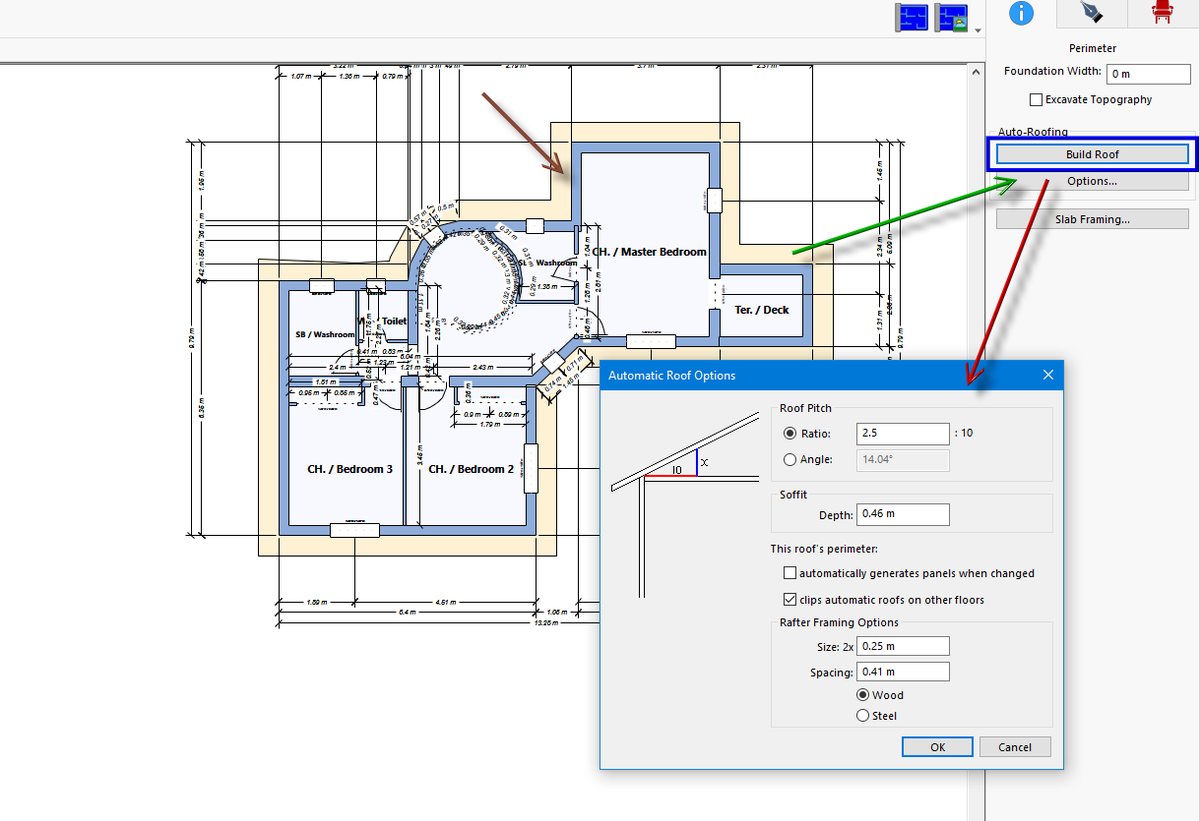
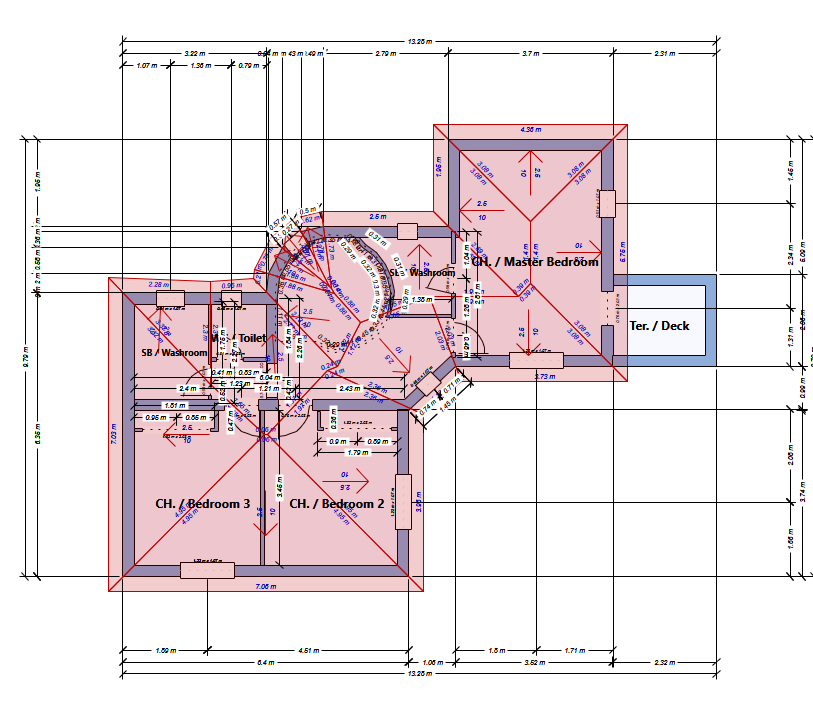
If the option to generate panels automatically when the walls change is ticked, the roof updates itself when you move or resize the perimeter walls.
Step 2: Roof each floor, then add dormers and skylights
If the building has more than one level, define the roofs for each floor separately: for example the main roof on the upper floor and a porch or single-storey wing on the ground floor.
Then add the details. The Dormer tool adds a dormer with its window to an existing roof plane, Dormer Cutout cuts the matching opening, and the Skylight tool places a roof window directly on a roof panel.
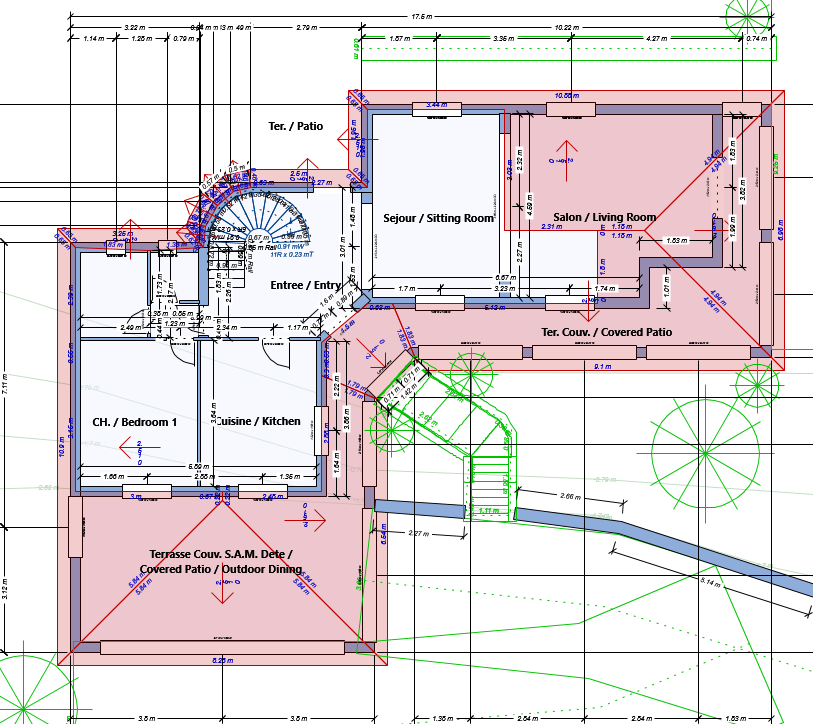
Step 3: Show every roof on one drawing
- Select the roof elements on the upper floor.
- On the Edit menu, choose Copy to Floor (Paste to Floor in some earlier versions) and pick the ground floor.
- View the ground floor: all the roof planes now appear on one plan. That is your roof plan.
Tip: do this step in a copy of your project (File > Save As), so your working model keeps a single set of roofs. Add dimensions and notes with the text and dimension tools before you print.