


Tutorial · Architect 3D 26 for Windows
Getting started with Architect 3D: your first house plan in minutes
Updated · About 6 minutes
Written for Architect 3D 26 for Windows. The Mac edition has similar tools, though some menu names differ.
Architect 3D opens in QuickStart, a room-by-room layout tool that turns a wish list of rooms into a floor plan in a few minutes. This tutorial takes you from a blank project to a 2D plan you can view in 3D, with doors, windows and the first pieces of furniture.
Step 1: Start a quick project
QuickStart opens automatically when Architect 3D starts. On the welcome screen, under New Project, click Quick Project.
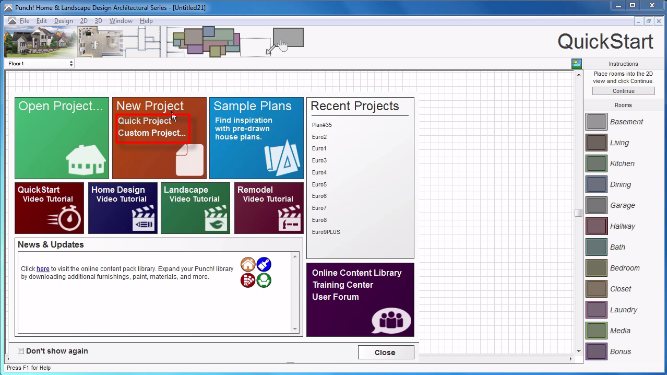
Prefer to set the number of floors and the ceiling heights first? Choose Custom Project instead. If you would rather open straight into the design window, clear Start in QuickStart under Edit > Preferences > User Interface.
Step 2: Lay out your rooms
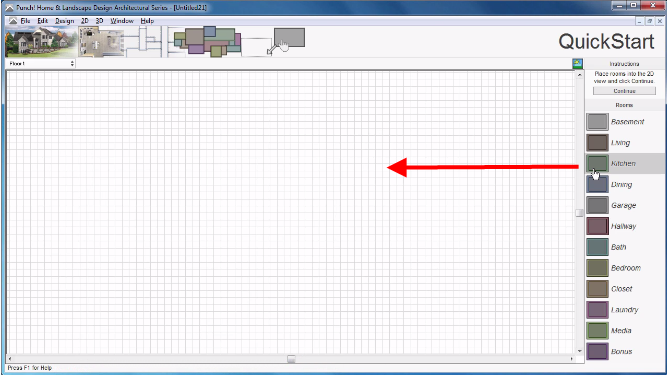
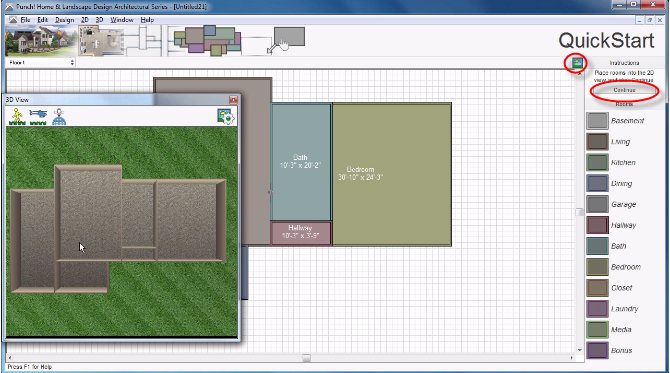
- Drag a room type from the list on the right (living room, kitchen, bedroom, bath and so on) into the design window.
- Drag the corners of each room to resize it. Place the rooms next to each other to build up the layout you want.
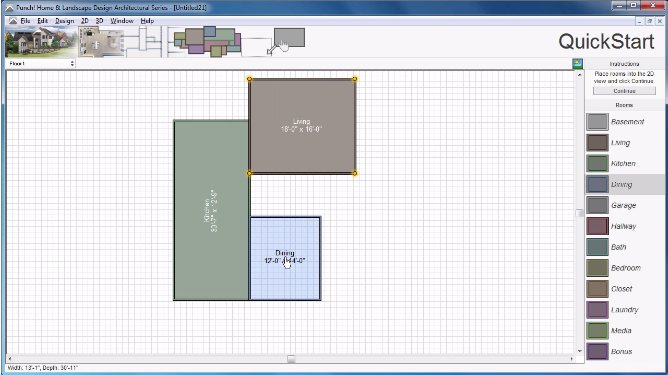
Click the 3D Preview button at the top right of the design window at any time to see the layout in 3D before you continue.
Step 3: Continue to the 2D plan
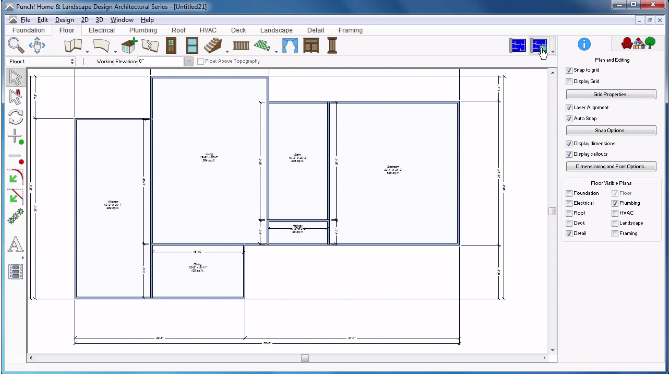
When the layout looks right, click Continue. QuickStart converts the rooms into walls and opens your project in the design window as a 2D plan. Hover over any tool for a hint that explains what it does.
Step 4: Work in 2D and 3D side by side
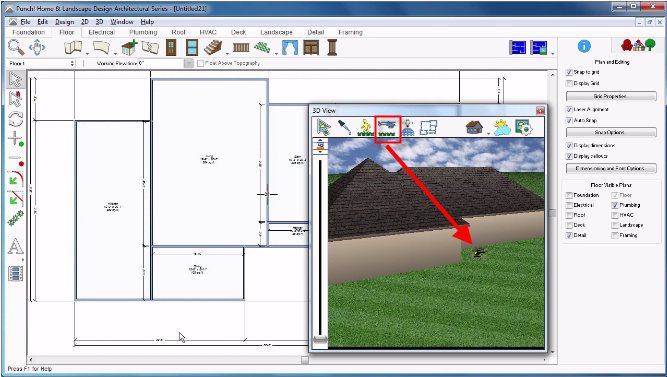
- Open the 3D View window to show the 2D plan and a 3D view at the same time. Every change you make on the plan appears in 3D straight away.
- Click Animated Fly-Around in the 3D window, hold down the left mouse button and move the mouse to rotate around your design.
Step 5: Add doors and windows
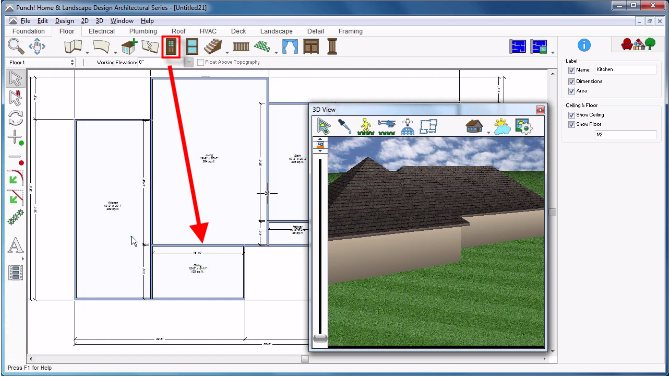
On the Floor tab, click the Door tool, then click on a wall to place each door. Do the same with the Window tool. The doors and windows tutorial shows how to choose styles, set sizes and flip the swing.
Step 6: Start furnishing
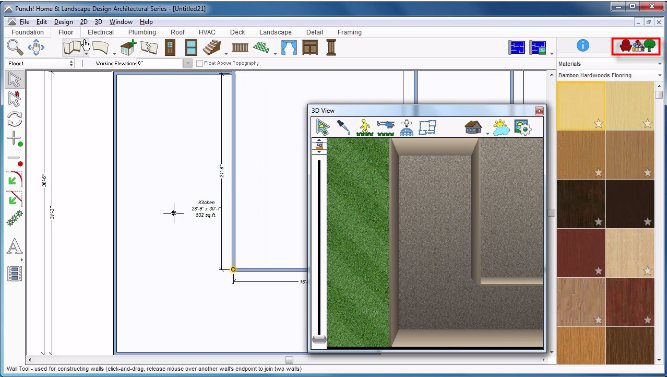
Open the Libraries tab and choose Objects from the drop-down menu to browse furniture, flooring, artwork and plants. Drag an item straight into the 3D view to place it, then fine-tune its position on the 2D plan.
Save your project, then carry on with the wall tools tutorial to split and join rooms, or the navigation tutorial to move around your house in 2D and 3D.