


Open Floor Plan Ideas Using Architect Software
The evolution of living spaces creates new definitions and concepts, some of them unimaginable a few years ago. This is the case for lofts, studio apartments and repurposed buildings. These options have a common characteristic: an open floor plan.
Let’s review this idea. An open floor plan means that two or more rooms are not defined in the traditional way using walls, doors, etc. Instead, we have a (usually) large room, ready for different sets of activities.
For example, we frequently see open floor plans that include kitchen + living room + dining room in the same area. Another design group contains home office, TV room and eating area. The options are endless and we will analyze a few of them.
How to define the layout of the different areas and uses in an open floor plan? These are some concepts and strategies that we (architects and designers) use to design these spaces.
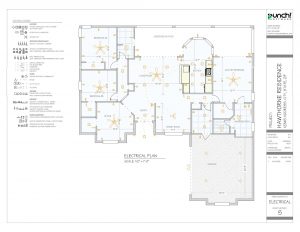
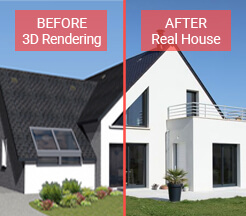
Planning in advance: one of the best approaches is the definition of the spaces using a 3D interior design software such as Architect 3D, for example. With this tool you will be able to create a complete visualization of the floor plan, elevations, walls’ decorations, lighting as well as trying different combinations among the different elements.
Defining furniture groups: an intelligent arrangement is the setting of furniture groups according to the different activities and styles. For example, we can produce a cozy corner area using an “L” shaped sofa or two armchairs, thereby defining a nice conversation area. Also, you can use a smart furniture layout to outline certain sectors of your open floor plan. For example, a bar or a small island might create a visual limit of the kitchen area.
Applying colors and materials on the walls: these elements play an important role in the design composition. However, we can test different ideas in the same project. For example, an open floor plan with lots of different materials and fabrics may use the same paint hue to unify the room ambiance. At the same time, a big loft may use different stucco textures, tiles or wallpapers to characterize each setting. Of course, I recommend the use of your interior architecture software to study the different colors and shadows, as well as the mix and match combinations.
Using the floors’ materials to define areas: the use of different floor materials is an interesting and useful idea in order to define areas. For example, the use of floor tiles in a kitchen area not only identifies the kitchen space but also provides an easy to clean finishing surface. For the living room areas, always consider an area rug to define that special space and add a cozy feeling.
Addressing the constructive characteristics: the structural features of a building often determine the visibility of some constructive components such as beams, columns, trusses, etc. Instead of attempting to hide these elements, use them in a creative way: a beam or a column featuring a different material may create a visual two rooms’ definition. Also, observe the plan’s ceilings or add new ceiling features: different ceiling heights and elevations, trays, and vaulted elements are excellent resources to define spaces and setting lighting components.
Utilizing multi-function furnishing: as the uses of our space will be assorted, the furniture and fixtures must be flexible enough to attend the different uses. Look for modular and movable pieces to facilitate the organization. For example, a sofa can double its function as a bed, the conversation armchairs can be the TV room seats, and the kitchen island can be a fun dining table. Your interior architecture software includes a large furnishing library so you can compare models and styles.
Incorporating flow and movement: optimize the room and the different areas by defining the circulation paths, physically and visually. One possibility can be creating an “S” shaped lane inside the room to move from one section to another. Another option is detaching the components from the wall, allowing the circulation around the room. Keep in mind that movement doesn’t include only walking from one point to another one: don’t forget the Feng Shui concepts regarding flowing energy elements such as air and light.
Adding a focal point as integrator: sometimes, the spaces are composed by several small areas with different characteristics. In these cases, the open floor plan gets a “full of activity” look, even in the relaxing corners. An excellent approach to this issue is the creation of a focal point as ambiance integrator. This focal point can be related with your working home office, a central media space with sound and image devices, a complete kitchen area for food lovers or even the exterior sight views or landscape, as we will see in an example below.
Integrating plans and levels: some lofts include more than one open level, connected through stairs. Usually the upper floor is used as a bedroom and in this case, keep in mind that some additional privacy elements may be necessary, such as louvered dividers or foldable screens.
Balancing the layout: in some plans, some activities have more design elements than other areas. For this reason, it is important to balance the components of the different areas in the plan to get a coordinated effect from the visual and activity perspectives.
With these concepts in mind, let’s review a few ideas in action through three very different projects.
Project 1 – The loft
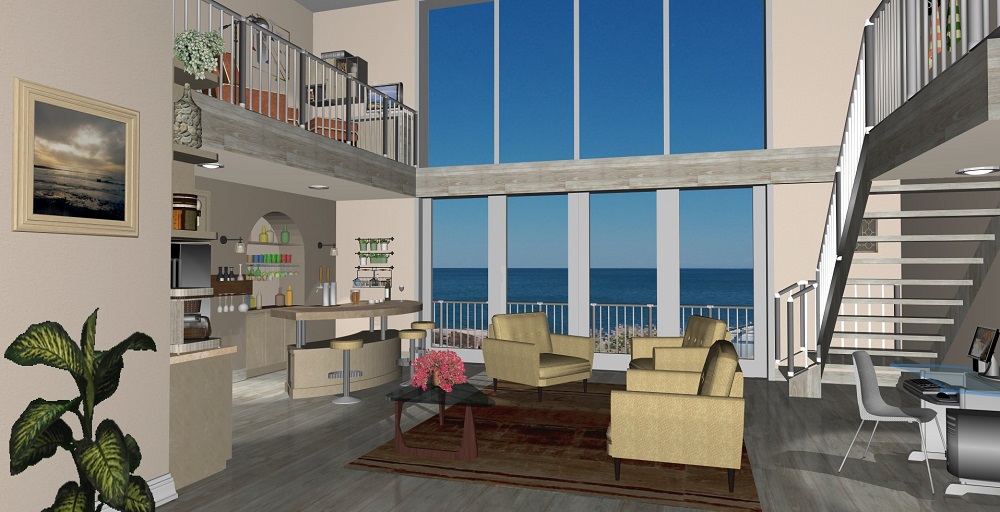
The project of this loft was created with a main idea: include the exterior views from every corner of this two-storey space.
A full height window allows a magnificent sight of the landscape that can be observed from the living room area, defined by an area rug. Notice that the kitchen and bar area also enjoy the view, as well as the upper floor reading and media area and even the home office area, through the open steps.
Although the paint color scheme integrates the space, the separation between levels is defined by the same wood material used for the floors and stairs.
Colors and materials also integrate a few elements such as the armchairs and bar stools fabric, for example.
The aluminium work used for the rails is the same for the exterior and interior elements, integrating both areas.
The balance in the main floor features the conversation area in the center of the room, the stairs and home office on the right, and the kitchen and bar area on the left.
The bar and eating area were outlined by taking advantage of an existing niche in the back wall that houses the glass elements. Wall organizers were added to complete the equipment.
Notice that can lights placed at different elevations create different beams and ambient illumination effects.
Project 2 – The repurposed building
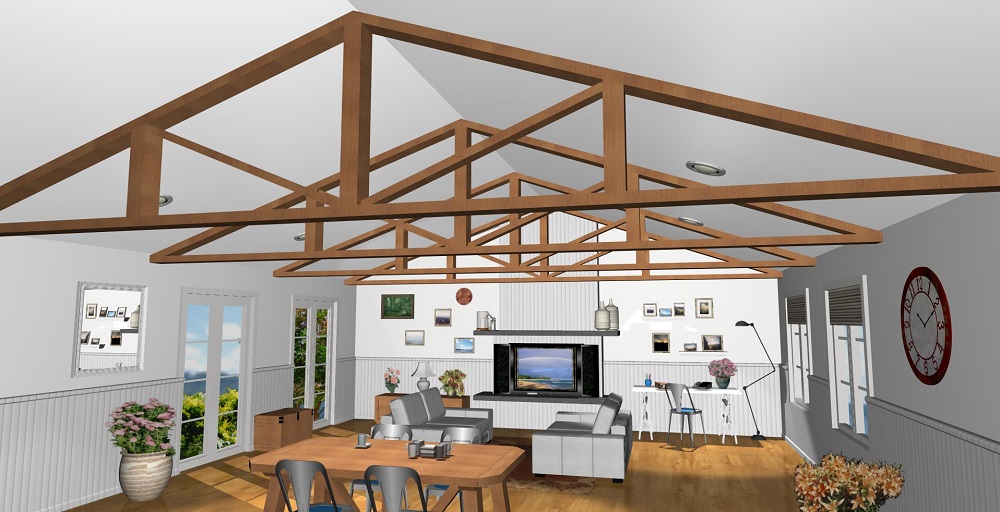
In the past, unused barns, sheds and storage structures were demolished in order to erect new buildings. However, the new trend is to recycle constructions, allowing the reuse of vintage elements and structural parts. In this repurposed edifice we identified two original elements: the wood trusses and the wainscot panels. We used these two components to delineate the project layout.
The trusses divide the plan in three identical intervals, which we used to define the different areas of our room (home office – conversation and TV room – eating area).
The can lights are centered between trusses, aligned with the windows and doors (in the first two spaces).
Although the space looks divided, we used several elements to integrate the plan. The vintage white wainscot panels run on the 4 sides of the room, creating a personal and cozy touch. The finishing color and material of the gable ceiling is white flat stucco. Matching this color, the sofas’ finishing is white leader.
The media center has a central placement, so it can be used from different locations in the room. At the same time, the living room area, defined by an area rug, is equipped with two comfy sofas, creating a flexible space that can be used as conversation area as well as a TV room.
The back of the room shows a pictures and arts collection that works as a focal point.
In this particular project we placed the living and eating areas in the very center of the room, detaching the furniture from the walls, creating a flowing circulation around the room, completed with the air and light fluidity coming from the aligned doors and windows.
Project 3 – The studio apartment
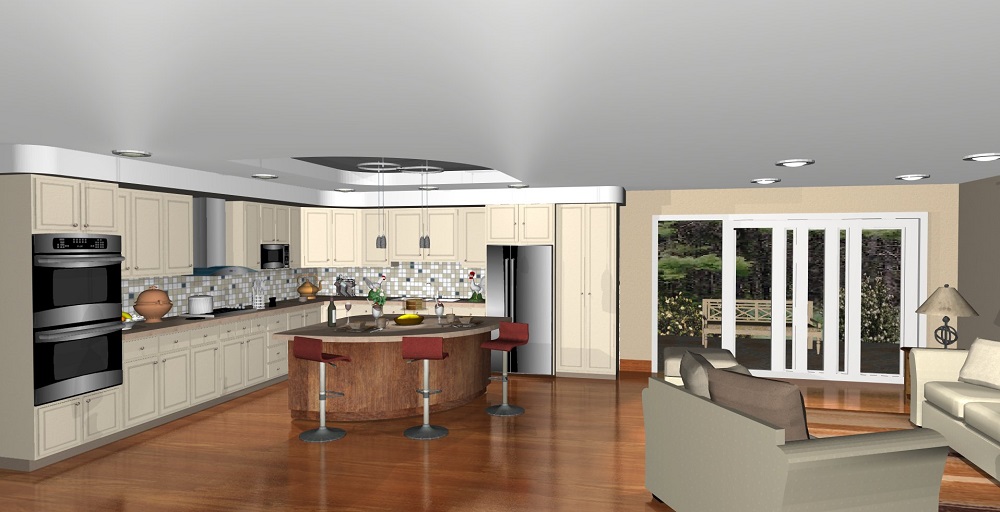
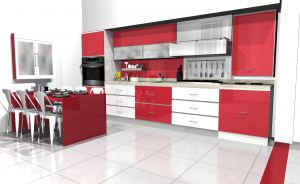
In this project, a complete kitchen with lots of cabinets was the main owner’s requirement, so the design considers the cooking area as the focal point. In this case, notice the flexibility and multiple functions of the island, serving not only as the kitchen’s additional counter area but also as a dining area. In addition, the lighting arrangements clearly define the warm eating area and the full activity kitchen.
The ceiling areas and trays outline the three interior functions (cook – eat – conversation corner).
The wood floor unifies the room and the area rug outlines the seating area. We used different shades of tan to characterize the areas, sofas, cabinets as well as the kitchen wall tiles. We combined a metallic style for the island stools, matching the appliances materials.
The large sliding doors integrate the exterior and interior seating areas.
Follow our advice and tips and covert your open floor plan into your dream home. Happy project!

Create the house of your dreams in 3D and become your own architect!
 Discover our range
